The following is excerpted from “Sharpen This,” by Christopher Schwarz. I chose this section because I get asked more about smoothing planes – specifically why they leave plane tracks – than anything else sharpening-related in my classes. I’d say that 80 percent of the time, the “problem” is a blade that has no camber. Here’s how to put one on the blades for a smoothing plane and jointer plane (a shallow curve).
– Fitz
The blades for my smoothing plane, jointer plane and block plane have slightly curved edges so that the corners of the iron do not dig into the wood and create “plane tracks.” Plane tracks are the ugly ridges left behind by the cutter’s corners.
To create a slight curve, begin with a blade that has been ground straight across. The curve is generated on the honing and polishing stones.
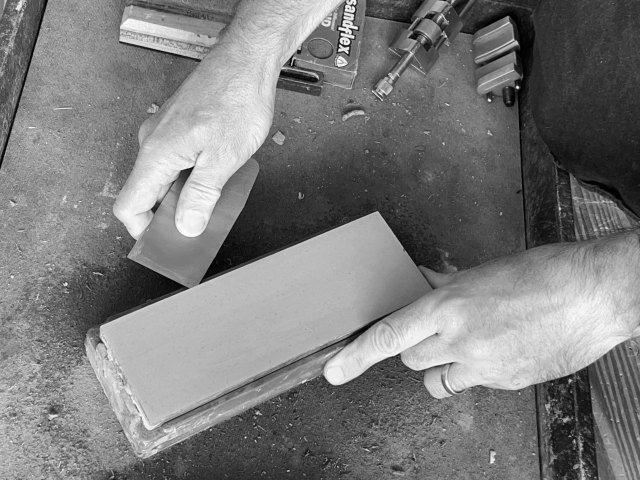
The first step is to round over the corners of your blade. I do this on the edges of my honing stone.
Why the edges? Because this process cuts a deep gouge in the stone, so the stone’s edges are a good place for it.
The result is that the corners are rounded over with a small radius – about 1/16″ radius.
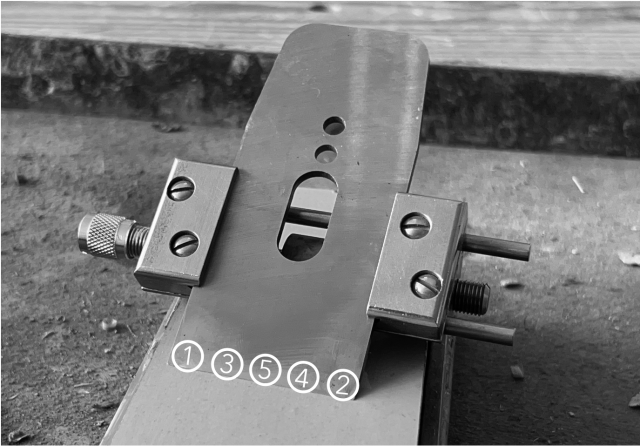
Now install the blade in your honing guide. To create the curve for the first time on a straight edge, mentally divide the edge into five “stations” along the tool’s edge. One station is in the middle of the edge. One at each corner. And two more between those points.
With the tool on your honing stone, put firm finger pressure on one of the corner stations and take 12 strokes. Then put firm finger pressure on the opposite corner station and take 12 strokes. Now put your finger pressure on one of the intermediate stations and take six strokes. Switch to the other intermediate station and take six more. Finally, put your finger pressure on the center station and take two strokes.
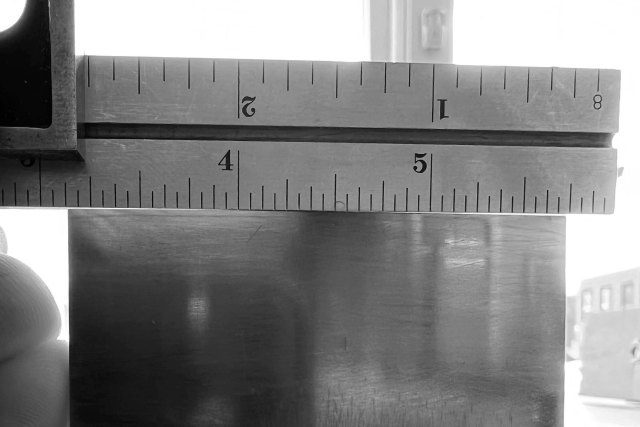
Remove the tool from the honing stone and check for a burr. If you have a burr, hold the tool up in front of your face with a strong backlight. Place a small straightedge on the tip of the edge to see if the edge is curved. If you cannot see a curve, there’s a fair chance your stone isn’t flat; it’s convex across its width. Flatten the stone (see Chapter 9) and try again.
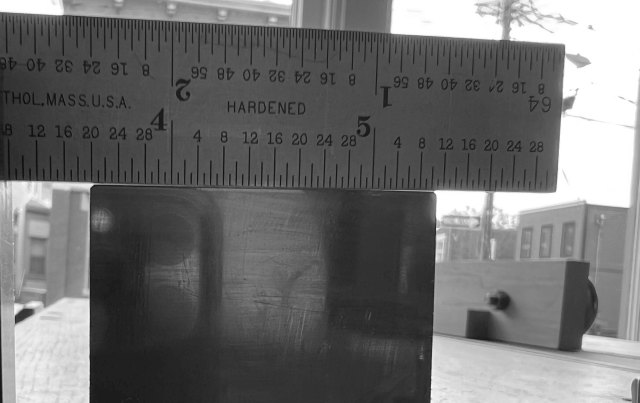
How much of a curve should there be? It depends on the width of the iron and the angle at which the iron is bedded. If you see a curve, continue onto polishing.
Put the tool to use and see if the curve is working (meaning there are no ugly plane tracks). If the curve is too shallow (plane tracks, argh), hone the iron with more pressure at the corners to increase the curve.
If the curve is too pronounced (where the iron will take only a narrow, thick shaving in the middle) then hone again with more pressure at the center station.
For freehand sharpening of curved blades, I press one corner of the bevel to the stone. Then I raise the back end of the tool 1/8″. As I pull the tool toward me, I also shift the pressure on the bevel to the center of the edge and then to the other corner.